Patterned HTV is not something to be scared of! Here’s why!

Here at Vinyl World, we often get customers contacting us with both questions and concerns using patterned HTV! “Where do I begin?”, “How do I use it?” and “What is a great project to start out with?”.
Today we are going to answer these three popular questions and demonstrate how to use our unique, Vinyl World Patterned Heat Transfer Vinyl.
Whilst there are many machines on the market today and all very capable of completing this project, today we will be using the Cricut Explore Air 2 and Cricut’s Design Space program to customise a blank tote bag with our patterned HTV.
What you’ll need for this project:
- Vinyl World Patterned HTV - Fine Rainbow from the Faux Glitter Collection
- Siser Glitter HTV - Silver
- Siser HTV Transfer Mask / TTD
- Calico Tote Bag of your choice in either Black or Natural. These are available in 2 sizes, 38cm x 30cm and 38cm x 42cm
Tools:
- Cutting Machine and Mats
- Squeegee
- Weeding Tool
- Heat Press- We are using the Siser Craft Heat Press
- Baking Paper or Teflon Sheet
Where do I begin?
Before beginning with any project, it is best to first and foremost select the design you're wanting to start with. There is a multitude of locations to get your SVG designs from, including amazing free svgs from the Vinyl World website. Today we are selecting a simple and yet effective design (as shown below) from the Cricut Design Space.
Once we have selected the design, it is easy to now select what types of vinyl you're wanting to use. Our selection today is the Vinyl World Patterned Vinyl, 'Fine Rainbow' from our Faux Glitter Collection.
Our Faux Glitter collection provides the look and appearance of true glitter vinyl, without the fuss, and sometime cost that can come with true glitter vinyl. It is an easy and simple process and great for beginners.
Our 'Fine Rainbow' vinyl is our hero piece and provides a basis for our design. All other colour selections will work around our hero piece. This provides a cohesive look and feel to our end design.
Preparing our design:

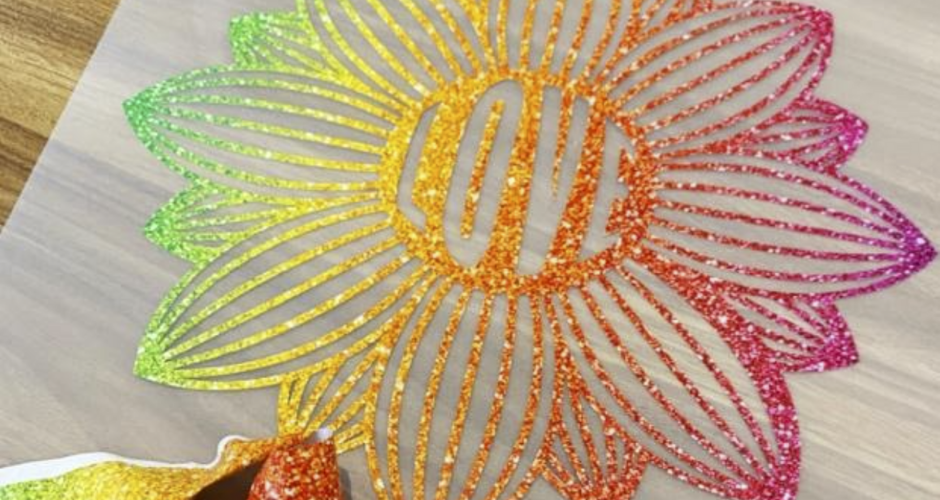
Today we have chosen this beautiful 'Love' flower design. Measure the space on your tote bag where you are planning to place your design and size up your file on Cricut Design Space accordingly.
We then determined which vinyl was going to be used for each layer. Today we have chosen the flower portion to be cut in our Faux Glitter Fine Rainbow and the word 'LOVE' to be cut in Siser's Silver Glitter.
Some important factors to note:
It is important to note that vinyl will differ vastly from brand to brand and type to type. Variances that can occur can be thickness, method of cutting as well as time and pressure in your heat press/heat source. If you are ever unsure, we always recommend checking our product pages for each item to double check. We always add important information here.
OUR VINYL WORLD PATTERNED HTV:
-
Our patterned HTV requires the use of a TTD mask to apply.
-
Our patterned Heat Transfer Vinyl (HTV) is suitable for cotton, polyester and poly-cotton blends which makes it a very versatile product.
- Our patterned HTV needs to be cut face up. Contrary to many popular brands of HTV, in this instance do not mirror your design.
- Press your design pattern side up and press it at 150c for 15 seconds.
- When peeling off your TTD mask, please note it is a hot peel and not a cold peel.
SISER GLITTER HTV:
- Siser Glitter needs to be cut face down. It has an inbuilt TTD mask, because of this, your design needs to be mirrored.
- Press your design with the glitter side up. This needs to be pressed at 150c for 15 seconds.
- Peeling off your mask can be either a hot or cold peel.
Cutting your design:
Once you have prepared your design, it is time to cut it. In this project, we used 2 mats, one for each piece of the design. We find that this is an easy way to stay organised, to easily weed your piece and to ensure that your design stays lint free and flat at all times. We are big lovers of the Nicapa mats. We use these with both the Silhouette and Cricut branded machines. Priced at under $6, you really can't go wrong.

First we cut our patterned HTV. As we mentioned, the majority of HTV on the market requires you to cut the design facing down and to reverse your design in your software. This is because there is a built in transfer mask. However, with our patterned HTV, there is no transfer mask applied, therefore you will need to cut your design facing upwards, just as you would standard adhesive vinyl.

Once cut, weed your design. You will need to apply a TTD mask to your cut and weeded design to transfer it to your tote bag.
WHAT IS TTD MASK?
When there is no carrier sheet pre-applied to HTV, a transfer mask is required. This clear mask allows you to accurately place the design onto the garment. Once heat pressed, it releases easily, leaving your design on your garment. We stock Siser’s TTD Easy Mask- Transfer Tape. You need to purchase this when purchasing the Vinyl World Pattern HTV. These can be reused.
How to apply:
Pre-heat your iron or heatpress. We find that using a heat press provides a consistent and professional finish. However, the humble household iron can be used. Our favourite heat-press is the Siser Craft Press.
- Pre-heat your Siser Craft Press or similar to 150c, as required for our patterned vinyl.
- Pre-press your tote bag for 10 seconds to draw out any moisture and make sure there is a smooth surface to begin with.
- Place down the first layer. In this instance, we are placing our Vinyl World Patterned HTV down first. This is placed onto the design face up, with the TTD mask applied to the top.
- This is a multi-layered project. Due to the multi-layered project, you will need to press the first layer for 5-7 seconds and then peel carrier sheet off.
- WARNING – the tote will be HOT so please take care and wait for the first layer to cool before adding the next layer.
- Place your 2nd layer of HTV into place. In this instance, this is our 'LOVE' word in Siser’s Glitter HTV.
- Before pressing, cover the design with either baking paper or a Teflon sheet and press for the complete15 seconds required.
- Remove baking paper or Teflon sheet and then remove your final carrier sheet.
- Wait for the tote to cool
Congratulations, you have now completed a beautiful tote and have successfully used the Vinyl World Patterned HTV.

Also in Vinyl Hub